Hondata FlashPro Install and Uploading an E-tune
Step 1 – Installing the FlashProManager software

· Begin by going to Hondata.com and downloading the latest version of Flashpro Manager.
· Click on the download Flashpro Manager here link on the Flashpro page to start the download.
· https://www.hondata.com/flashpromanager
Step 2 – Locating the ODB-II port and plugging in the FlashPro
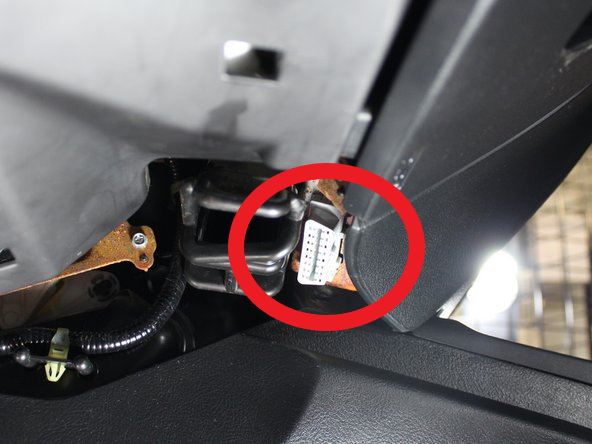
Locate the OBD2 port below the dashboard on the driver side.

Plug your Flashpro into the port.

Switch on the ignition but do not start the engine. This will send the vehicle information to the Flashpro that you will need to lock the Flashpro to your ECU.

Step 3 – Disconnect the FlashPro, Connect to a PC, Lock to the Vehicle
Start by plugging your Flashpro into your computer with the supplied USB cord. Driver installation may be required.
Click on the Flashpro button at the top of the Flashpro manager. This will open up the window to fill out information to register with Hondata.

Fill out the information to register with Hondata

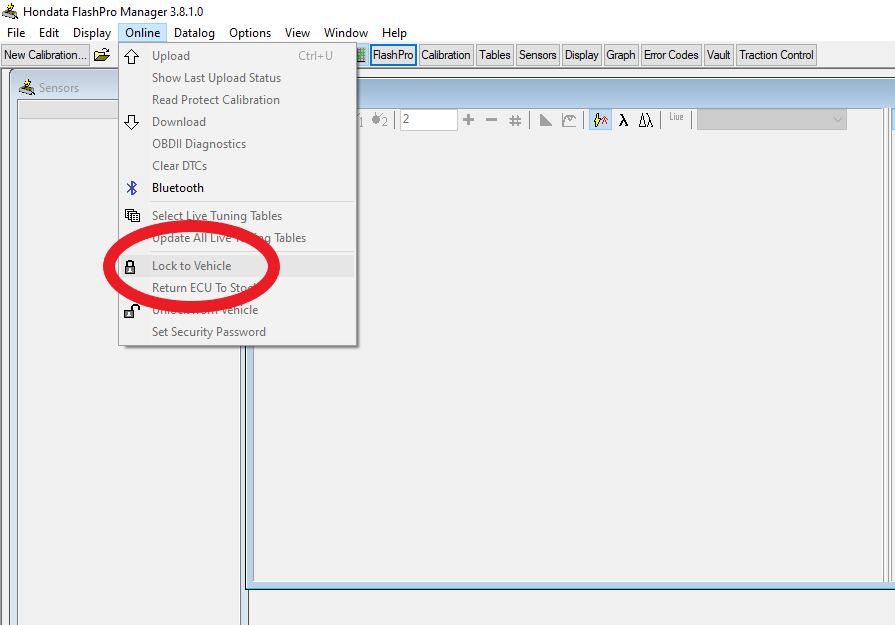
Click the Online button at the very top of the Flashpro manager window. This will open a drop down box for you to select to lock your Flashpro to your vehicle.

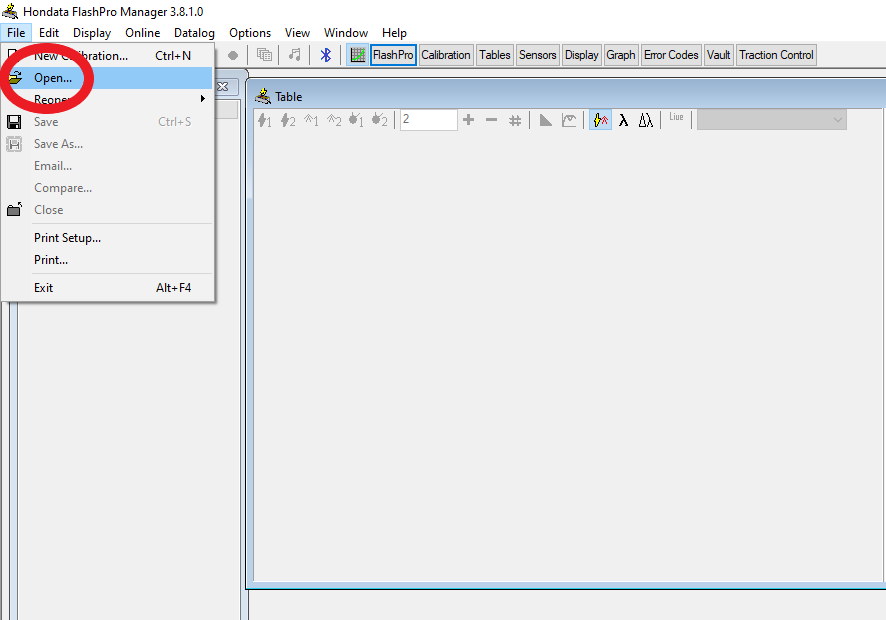
Click File > Open and select the Flashpro Calibration stored on your computer

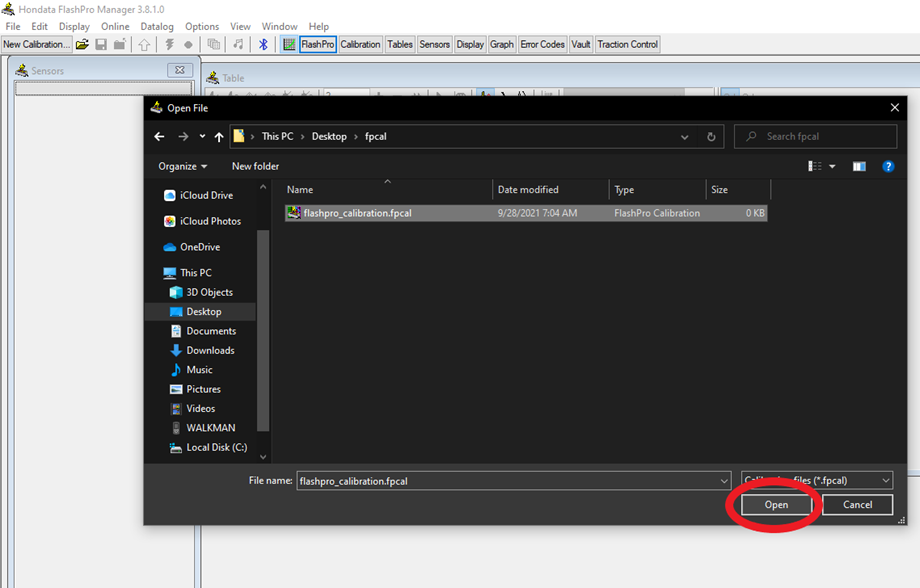
Navigate to where the Flashpro Calibration is stored, click Open

Upload your calibration to your Flashpro by selecting the Flashpro button, then click Upload

It is possible to upload a calibration to the FlashPro, which can then later be uploaded to the ECU. You can have two calibrations on the FlashPro – termed primary and secondary calibrations.

Step 4 – Flash the calibration onto the car by unplugging the FlashPro from the PC and take the FlashPro out to the car.
Connect the FlashPro to the car OBD-II port under the dash, and turn on the ignition to the car, but do not start it. After a few seconds, with green lights on the FlashPro, press and hold the Program button on the FlashPro for 5 seconds, then release. This will upload the Primary calibration into the ECU. If the car is a 2007 or newer Si, the coolant temperature gauge will go out during the flashing process. The FlashPro program light will be blinking. Also, the RPM Tach will count upwards indicating the % complete.
During this time, do nothing that could interrupt the flash process. Do not move, do not open the windows, do no open the doors. All of these things will affect battery voltage or could cause static discharge.
The program light will flash for 1 minute and 30 seconds while the calibration is uploaded. The light will stop flashing once the calibration is completely uploaded. When the Flash process is done, the coolant temperature gauge will come back, and on all models you will here the fuel pump run for about 3 seconds. Also, the FlashPro will no longer be blinking.
Now you are safe to start the car.
Step 5(Optional) – Uploading a 2nd Stored Calibration from the Hondata FlashPro
Holding the Datalog button down, press the Program button for at least one second, releasing the Program button before the Datalog button.
During this time, do nothing that could interrupt the flash process. Do not move, do not open the windows, do no open the doors. All of these things will affect battery voltage or could cause static discharge.
The program light will flash for 1 minute and 30 seconds while the calibration is uploaded. The light will stop flashing once the calibration is completely uploaded. When the Flash process is done, the coolant temperature gauge will come back, and on all models you will here the fuel pump run for about 3 seconds. Also, the FlashPro will no longer be blinking.

